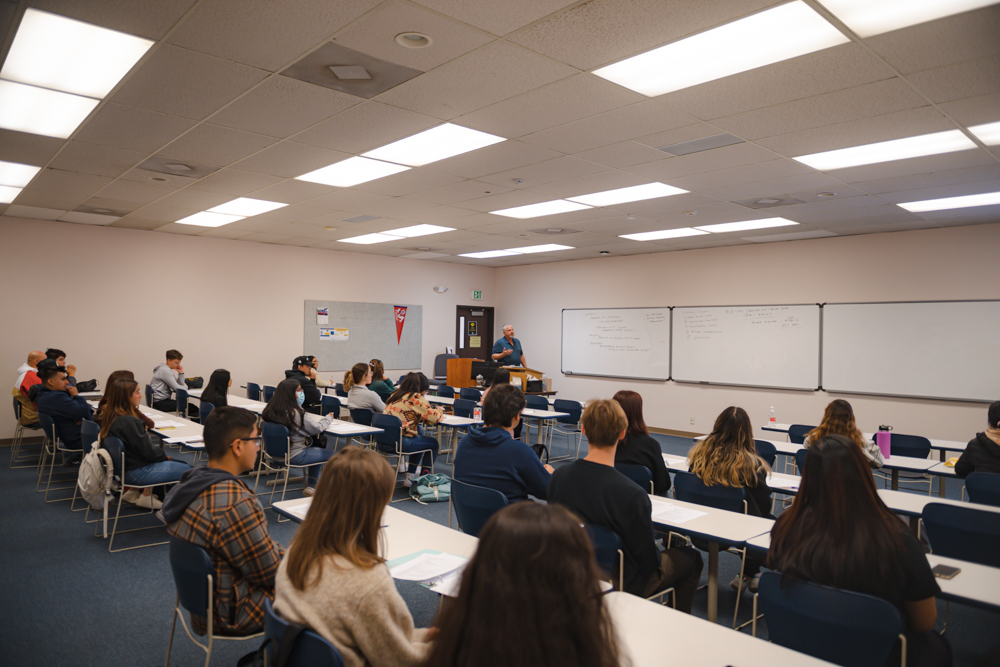
The First Day of Class
Every semester begins the same way. Students walk into my classroom carrying expensive camera bodies, new mirrorless systems, and lenses that cost more than my first car. A few rely entirely on their phones, confident that technology has already solved the hard work for them. Some have read online forums. Others have watched hours of tutorials. Almost all assume that better gear will produce better images.
I wait until everyone settles into their seats. Then I walk to the board and write a single sentence.
Light matters more than gear.
I do not elaborate immediately. I let the sentence sit there. In twenty five years of teaching, I have learned that foundational photography tips are rarely glamorous. They are rarely dramatic. They are disciplined habits, practiced consistently. Cameras change. Software changes. Trends change. Light does not.
Students often believe that photography is about settings first. It is not. It is about understanding light before touching a single dial.
Section 1: Understanding Light
If I could reduce my entire curriculum to one principle, it would be this: control and interpret light intentionally. Every other technical skill rests on this foundation.
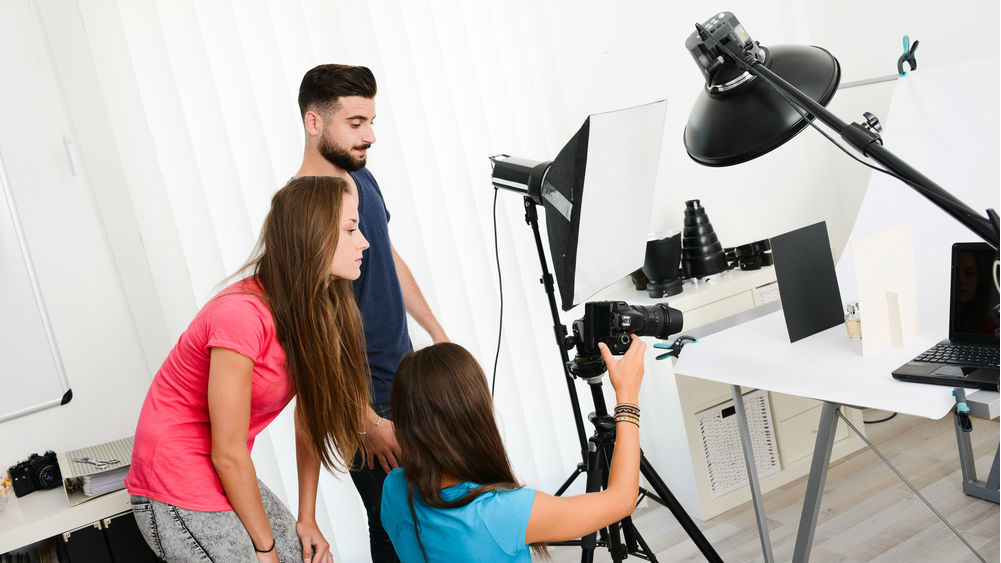
Natural light behaves differently than artificial light. Sunlight shifts throughout the day. It changes direction, color temperature, and intensity. Artificial light, whether from strobes, LEDs, or tungsten bulbs, gives you consistency but often introduces complexity in color balance.
One of the first photography tips I give beginners is to study direction before exposure. Ask yourself: Where is the light coming from? Front lighting reduces texture and flattens subjects. Side lighting creates dimension. Backlighting introduces separation but demands careful exposure control.
In my introductory class last year, a student photographed a portrait at noon. The sun was directly overhead. The shadows fell sharply under the subject's eyes and nose. The result was harsh and unflattering. The student believed the camera had failed. It had not. The light was the problem.
Hard light produces sharp, defined shadows. Soft light produces gradual transitions. Cloud cover acts as a natural diffuser. Overcast days are often better for portraits than bright, direct sun. This surprises students every semester.
Golden hour, the period shortly after sunrise and before sunset, produces low angled, warm light. It lengthens shadows and enhances depth. I encourage students to observe how skin tones change during that time. The camera simply records what the light provides.
Window light remains one of the most underused tools in beginner photography. Positioning a subject at a forty five degree angle to a window often produces dimensional, sculpted lighting without additional equipment. Yet students frequently stand subjects directly facing the window, flattening the image.
Another common mistake involves mixed color temperatures. A student once photographed indoors under tungsten bulbs while daylight entered through a window. The resulting image contained blue shadows and orange highlights. No camera setting could fully correct it. Understanding light sources beforehand would have prevented the issue.
These tips may sound simple, but simplicity does not mean ease. Learning to see light requires repetition. It requires standing in one place and observing how shadows move across a surface. It requires patience.
Light Before Settings
I tell my students that exposure settings are responses, not starting points. The light dictates your settings, not the other way around. Before adjusting aperture, shutter speed, or ISO, evaluate the quality and direction of light.
One exercise I assign early in the semester involves photographing the same subject in five different lighting conditions. Morning light. Midday sun. Overcast sky. Indoor window light. Artificial lamp light. The goal is not perfection. The goal is awareness.
When students begin to notice differences without looking at their LCD screen, they are learning properly. They begin anticipating how the image will look before pressing the shutter.
That anticipation is the beginning of discipline.
Once students begin to understand light, we move into what most of them expected on the first day: camera settings. I introduce the exposure triangle carefully because it is often oversimplified online. Aperture, shutter speed, and ISO are not independent tricks. They are interdependent controls that must balance each other. When one changes, at least one other must respond. There is no shortcut around that reality.
Aperture controls the size of the lens opening. Technically, it is expressed in f-stops. The smaller the number, the wider the opening. The wider the opening, the shallower the depth of field. Students are often fascinated by blurred backgrounds. They shoot everything at f/1.8 during the first month of class. While shallow depth of field can isolate a subject beautifully, it is not universally appropriate. A portrait at f/1.8 may render one eye sharp and the other soft. In product photography, critical details can disappear. In group portraits, one person may be sharp while others fall out of focus. Understanding when depth of field supports the image is more important than simply achieving blur.
Shutter speed controls time. It determines how long the sensor is exposed to light. Fast shutter speeds freeze motion. Slow shutter speeds record motion. This seems straightforward until students must make practical decisions. A sports photography student once photographed a basketball game at 1/60 of a second. Every frame showed motion blur. The problem was not the lens. It was the decision. Indoor sports typically require shutter speeds of at least 1/500 or faster, depending on the action. If you want motion sharpness, shutter speed must take priority.
ISO controls the sensor's sensitivity to light. Higher ISO allows shooting in darker conditions but introduces digital noise. Noise reduces clarity and dynamic range. Beginners often raise ISO unnecessarily instead of adjusting aperture or shutter speed thoughtfully. I remind them that ISO should be increased deliberately, not casually. Modern cameras handle noise well, but noise is still a compromise.
The interaction between these three elements is what creates proper exposure. If a student widens the aperture, more light enters. To maintain exposure, shutter speed may need to increase. If shutter speed slows, ISO may need to decrease. The triangle is not a theory. It is a balancing act that occurs every time the shutter button is pressed.
One semester, a student brought me a series of landscape images that looked unusually flat. Everything was technically in focus, but the scene lacked depth. When I checked the settings, the images were shot at f/16 at noon with direct overhead light. The small aperture increased depth of field, but the lighting direction removed dimension. The student assumed f/16 was automatically correct for landscapes. There is no automatic setting for creativity. Technical control must match intent.
Another classroom moment remains memorable. A student photographing indoor volleyball complained that the images looked dark and grainy. They had selected f/16 to keep everything sharp. At that aperture indoors, the camera compensated by raising ISO to extreme levels, introducing heavy noise. We changed the aperture to f/2.8, increased shutter speed, and controlled ISO more carefully. The difference was immediate. The lesson was not simply about aperture. It was about priorities. In fast action scenarios, shutter speed comes first. Aperture supports it. ISO fills the remaining gap.
Students often ask which setting matters most. The answer depends entirely on the subject. If the goal is background separation in a portrait, aperture may take priority. If the goal is freezing motion, shutter speed leads. If the scene is dark and movement is minimal, ISO adjustments may become necessary. Exposure decisions must serve the subject, not habit.
I also emphasize metering awareness. Cameras offer evaluative, center weighted, and spot metering modes. Beginners rarely consider which metering mode they are using. They trust the default setting. Yet a backlit portrait can confuse evaluative metering, resulting in an underexposed subject. Spot metering on the subject's face often solves the issue. The camera measures light. It does not interpret importance. That responsibility belongs to the photographer.
Histogram analysis becomes part of our weekly critiques. I project a student image and display its histogram. Many are surprised to see clipped highlights or blocked shadows that were not obvious on their camera screen. I teach them to protect highlights first, especially in bright conditions. Lost highlight detail is rarely recoverable. Shadow detail, on the other hand, can often be recovered when shooting in RAW format.
Shooting in RAW rather than JPEG is another foundational principle. RAW files retain significantly more information. They provide flexibility in post production without degrading image quality quickly. Students who resist RAW often change their minds after comparing recovery capability in high contrast scenes. This is not about complexity. It is about preserving options.
As the semester progresses, I encourage manual mode usage. Not because it is superior in every situation, but because it forces awareness. When students adjust aperture and shutter speed manually, they begin predicting exposure outcomes. They stop reacting and start anticipating. Anticipation is one of the most important skills in photography.
There is a moment each term when the exposure triangle stops feeling mathematical and starts feeling intuitive. A student adjusts settings without hesitation. They understand that the dim gymnasium requires wide aperture and fast shutter speed. They know that the bright beach scene allows lower ISO. That shift from guessing to knowing is when photography becomes a learned tool.
Exposure control is not about memorizing numbers. It is about understanding relationships. Light informs aperture. Motion informs shutter speed. Environment informs ISO. When students internalize those relationships, the camera becomes an extension of their judgment rather than a device they struggle to control.
By the time we finish this section of the course, I expect students to look at a scene and estimate settings before lifting the camera. They are not always exact, but they are close. And being close means they are thinking correctly. Precision improves with practice. Awareness must come first.
Once exposure begins to feel controlled rather than accidental, we shift into composition. This is where many students believe creativity lives. In reality, composition is structure. It is decision making. It is the deliberate arrangement of elements within the frame. Without structure, even technically perfect exposure feels incomplete.
The rule of thirds is often the first compositional principle students encounter. I explain it carefully so it does not become a crutch. Dividing the frame into a grid of nine equal parts and placing important elements along those lines or intersections can create balance and visual interest. However, I remind students that it is a guideline, not a law. When used blindly, it becomes formulaic. When understood, it becomes flexible.
One student consistently centered every subject. Portraits were centered. Buildings were centered. Even off center subjects were corrected back to the middle. During critique, I asked why. The student responded that it felt balanced. I showed the same image cropped slightly off center, allowing negative space to create direction. The shift was subtle but powerful. Centering can work when symmetry is the subject, but when everything is centered, nothing feels intentional.
Leading lines are another foundational principle. Roads, fences, hallways, rivers, and architectural elements naturally guide the viewer's eye. The important lesson is not simply to include lines, but to consider where they lead. If a line directs attention out of the frame, the image loses containment. If it leads toward the subject, it reinforces importance. Students often discover that slight changes in camera position alter how lines behave dramatically.
Framing within the frame introduces depth. Doorways, windows, tree branches, and archways can surround a subject and create layers. When done correctly, framing gives context without distraction. When done poorly, it clutters the image. I encourage students to step left, step right, crouch, or elevate the camera slightly before committing to a composition. Minor adjustments often refine framing significantly.
Negative space is frequently misunderstood. Students fear empty areas in the frame. They attempt to fill every corner. Yet negative space allows breathing room. It emphasizes the subject by contrast. A portrait against a clean wall often carries more impact than one surrounded by unnecessary detail. The absence of information can be as powerful as presence.
Foreground interest becomes particularly important in landscape work. A photograph of distant mountains may feel flat if the foreground is empty. Including rocks, plants, or texture in the foreground creates depth cues. It establishes scale and draws the viewer inward. I show side by side comparisons in class to demonstrate how foreground elements transform otherwise ordinary scenes.
Symmetry and asymmetry both serve purposes. Symmetry provides order and calm. Architectural photography often benefits from precise symmetry. Asymmetry introduces tension and energy. The key is awareness. When symmetry is accidental, it feels careless. When symmetry is intentional, it feels deliberate. Students learn to decide rather than drift.
Clutter remains one of the most common beginner mistakes. Background distractions undermine strong subjects. During critique, I frequently zoom into the edges of a student's image. A stray trash can, a bright exit sign, a pole appearing to extend from a subject's head. These small distractions dilute focus. I encourage students to scan the entire frame before pressing the shutter. The camera records everything within the boundary. Selectivity must occur before capture.
Cropping is another discipline. Many students rely on post production to fix composition. While cropping can refine an image, it should not replace thoughtful framing. Excessive cropping reduces resolution and can compromise quality. I ask students to compose tightly in camera whenever possible. This habit strengthens awareness and reduces dependency on correction later.
One assignment I give involves limiting students to fifty frames during a two hour session. Digital photography allows thousands of exposures, but abundance often reduces intention. Limiting frames forces students to slow their decision making process. They consider angle, light, and background before shooting. The result is fewer but stronger images.
There is a particular critique that I repeat every semester. A student presents a technically sound image with proper exposure and sharp focus. Yet something feels incomplete. I ask where the viewer's eye should land first. Silence follows. The subject is unclear. Composition must guide attention. Without hierarchy, the viewer drifts aimlessly across the frame.
I encourage students to ask three questions before pressing the shutter. What is the subject. Where is the light coming from. What elements support or distract from the subject. These questions unify light, exposure, and composition into a cohesive process.
Composition is not decoration. It is communication. Every placement decision conveys priority. Every omission conveys restraint. When students begin adjusting their physical position rather than relying solely on zoom lenses, their images improve immediately. Movement is one of the simplest yet most powerful compositional tools.
By mid semester, students begin to recognize patterns. They notice when backgrounds are busy. They see when lines misdirect attention. They feel when balance is off. That awareness signals growth. Technical photography tips begin integrating into instinct. And instinct, built on discipline, produces consistency.
After students gain confidence in exposure and composition, we turn to a subject that many underestimate: color accuracy and white balance. Color is emotional. It shapes perception immediately. Yet it is also technical. If white balance is incorrect, even a well composed and properly exposed image can feel wrong.
Most beginners rely entirely on auto white balance. Modern cameras perform reasonably well, but they are not infallible. Under mixed lighting conditions, auto white balance often averages conflicting color temperatures, producing inconsistent results. The camera cannot determine which light source is dominant or most important. That decision must come from the photographer.
I begin this section with a simple demonstration. I photograph the classroom under tungsten lights using daylight white balance. The resulting image appears heavily orange. Then I switch to tungsten white balance and the color normalizes. Students immediately see the difference. The exercise is straightforward but effective. It reinforces that white balance is not cosmetic. It is foundational.
Color temperature is measured in Kelvin. Lower Kelvin values produce warmer tones. Higher Kelvin values produce cooler tones. Daylight typically falls around 5500K. Tungsten lighting may fall closer to 3200K. Shade can push toward 7000K or higher. These numbers are not meant to intimidate. They provide a framework for understanding why images shift in tone.
Mixed lighting presents one of the most common classroom challenges. A student once photographed an indoor event where overhead fluorescent lights combined with window light. The faces near the windows appeared neutral, while those under fluorescent lights leaned green. The camera attempted to balance both and failed. I explained that sometimes the solution is to control the environment, block certain light sources, or reposition subjects rather than relying solely on correction later.
Shooting in RAW format becomes particularly important in these scenarios. RAW files preserve more color information and allow for more accurate adjustments in post production. JPEG compresses data and limits flexibility. I show side by side comparisons of the same image corrected from RAW and JPEG. The difference in subtle tonal shifts is significant.
Custom white balance is another tool I teach early. Using a gray card or neutral reference allows students to set white balance precisely in challenging conditions. It requires preparation and intention. Some students initially resist the extra step. After encountering inconsistent results, they begin to appreciate the discipline it offers.
Color accuracy extends beyond white balance. Saturation and vibrance adjustments in editing can distort reality quickly. Students often increase saturation excessively, believing stronger color equals stronger impact. Oversaturation reduces subtlety and can create unrealistic skin tones. I encourage restraint. Color should enhance, not overwhelm.
Skin tone accuracy receives particular attention in my intermediate classes. Human viewers instinctively recognize unnatural skin tones. Slight shifts toward green or magenta can make portraits feel uncomfortable. I teach students to examine skin tones carefully during editing. Small adjustments often produce significant improvements.
Another frequent issue involves overly warm edits. Students sometimes push warmth sliders aggressively to create a golden appearance. While warmth can create mood, excessive warmth removes tonal contrast and realism. Conversely, overly cool edits can feel sterile and lifeless. Balance is essential.
We also examine the impact of color on storytelling. A cooler color palette can suggest distance or tension. Warmer tones can suggest intimacy or comfort. However, mood should not override accuracy unintentionally. If the scene was neutral, extreme shifts should be deliberate, not accidental.
In critique sessions, I ask students why they chose a particular color treatment. If the answer is uncertainty, we revisit fundamentals. Editing decisions must align with intent. If the intent is documentary realism, color accuracy becomes paramount. If the intent is interpretive art, deviation may be justified, but it must remain controlled.
White balance mistakes often reveal themselves in series work. A single image may appear acceptable. When placed next to others, inconsistencies become obvious. I encourage students to review images collectively rather than individually. Consistency reflects professionalism.
One memorable classroom discussion involved a student who preferred dramatic color grading. We debated realism versus stylization. I explained that stylistic choices should build upon technical competence, not replace it. Understanding neutral color is a prerequisite for controlled deviation.
By the end of this unit, students begin to see color shifts immediately. They recognize when indoor light casts a yellow tint. They anticipate adjustments before loading files into editing software. That predictive awareness is the goal. Good photography tips do not end at capture. They extend through processing with the same discipline.
Color management may seem secondary compared to exposure or composition, but in practice it is equally important. A photograph communicates through light, structure, and color simultaneously. Neglecting any one of these weakens the whole.
Once students understand capture fundamentals, we transition into editing. This is where discipline is tested most visibly. Modern software allows dramatic transformations with minimal effort. Sliders can reshape light, exaggerate contrast, and amplify color instantly. The challenge is not access to tools. The challenge is restraint.
I begin this section by projecting an image edited twice. The first version is subtle. Exposure is balanced. Highlights are protected. Shadows retain detail. The second version is heavily processed. Contrast is extreme. Saturation is elevated. Clarity is pushed aggressively. Students often react strongly to the dramatic version at first glance. Then I ask them to look longer. Details begin to fall apart. Skin tones shift unnaturally. Highlights lose texture. What seemed impressive initially begins to feel excessive.
One of the most important photography tips I repeat in editing sessions is this: protect your highlights. When highlights are clipped, detail disappears permanently. Bright skies become blank white patches. Reflective surfaces lose nuance. I encourage students to lower exposure slightly during capture to preserve highlight detail, then lift shadows carefully in post processing if needed.
Dynamic range must be maintained thoughtfully. Cameras capture a limited range compared to human vision. Editing should support that range, not distort it. Extreme high dynamic range processing flattens contrast and removes depth. When every shadow is lifted equally and every highlight is compressed, the image loses dimensionality.
Sharpening is another area where beginners overcorrect. Excessive sharpening introduces halos around edges and amplifies noise. I demonstrate appropriate sharpening by zooming into fine detail. Sharpening should enhance clarity subtly, not announce itself visibly. The goal is refinement, not exaggeration.
Saturation and vibrance sliders require equal caution. Increasing saturation uniformly affects all colors, often producing unnatural results. Vibrance selectively increases muted tones and is generally safer, but even vibrance can become excessive. I encourage incremental adjustments followed by stepping away from the screen briefly. Fresh eyes detect imbalance more reliably.
Skin tone integrity remains central in portrait editing. I instruct students to avoid aggressive contrast that deepens facial shadows unnaturally. Minor exposure adjustments and subtle color corrections usually produce better results than heavy filters. Portrait subjects should look like themselves, not like stylized versions shaped by trends.
Presets are convenient but risky. Many students import preset packs that promise cinematic results. When applied indiscriminately, presets ignore lighting conditions and subject matter. I explain that presets can serve as starting points, but every image requires individual evaluation. Editing decisions must respond to the original capture.
In one class discussion, a student defended dramatic editing by arguing that photography is art and art should be bold. I agreed that interpretation is valid. However, I asked whether the dramatic look supported the subject or overshadowed it. The room grew quiet. Artistry and discipline are not opposites. They are partners.
Color grading trends shift every few years. High contrast black and white. Muted tones. Teal and orange palettes. Soft matte finishes. I remind students that trends are temporary. Fundamentals are permanent. Strong images maintain impact regardless of fashion.
Editing should feel like refinement rather than rescue. If an image requires extreme correction, capture decisions likely need improvement. I teach students to solve problems during shooting whenever possible. Adjust light. Recompose. Change angle. Editing should polish intention, not fabricate it.
Workflow organization also matters. Students often neglect file management and non destructive editing practices. I emphasize the importance of preserving original files, working with adjustment layers, and maintaining version control. Professional habits extend beyond aesthetics.
We examine before and after comparisons frequently. The strongest edits are often those that viewers barely notice. Balanced exposure. Clean color. Subtle contrast. Images that feel natural yet refined demonstrate control.
There is a moment late in the semester when students begin editing more conservatively without prompting. They reduce slider intensity. They compare versions critically. They undo changes that once felt impressive. That restraint signals maturity.
Editing, like exposure and composition, requires judgment. Technical photography tips apply equally in post production. Control light carefully. Preserve detail. Maintain realism unless deviation is intentional. And above all, remember that the photograph should lead, not the software.
By this point in the semester, students have absorbed a considerable amount of information. Yet patterns of error persist. Recognizing common beginner mistakes is not about criticism. It is about accelerating growth. When students understand predictable errors, they begin correcting themselves before critique sessions.
One of the most frequent mistakes is shooting everything wide open. The appeal of a blurred background is strong, particularly with fast lenses. However, shallow depth of field is not universally appropriate. Environmental portraits often benefit from greater depth to provide context. Group photographs require sufficient focus across subjects. I advise students to ask whether background blur supports the image or merely imitates a trend.
Another recurring issue is reliance on built in flash. On camera flash produces flat, direct light and harsh shadows behind subjects. It eliminates texture and depth. I demonstrate how bouncing flash off ceilings or walls softens light dramatically. When possible, I encourage the use of natural light or off camera flash placement to create dimension.
Ignoring background distractions continues to undermine strong subjects. During critiques, I often enlarge the image and scan edges deliberately. Bright objects at frame boundaries pull attention away from the subject. Exit signs, trash bins, and stray branches frequently appear unintentionally. I encourage students to check corners before pressing the shutter.
Tilted horizons appear consistently in landscape work. A slightly angled horizon can feel unsettling unless intentionally used for effect. Most cameras provide grid overlays to assist alignment. I remind students that correcting severe tilt in post processing often requires cropping, reducing composition flexibility.
Over sharpening is another technical misstep. When clarity sliders are pushed excessively, fine edges develop halos. Texture becomes brittle. Noise intensifies. Sharpening should enhance existing detail subtly. I recommend zooming to one hundred percent when evaluating sharpening adjustments, then zooming out to confirm overall balance.
Over editing in general remains a persistent problem. Heavy contrast, exaggerated color grading, and extreme dynamic range adjustments often appear during early assignments. Students sometimes equate intensity with improvement. I remind them that subtlety often demonstrates greater control.
Relying on presets without understanding underlying adjustments is another common shortcut. Presets apply predefined combinations of exposure, contrast, and color adjustments. While convenient, they do not replace judgment. I ask students to study what each preset changes. Knowledge must precede automation.
Inconsistent exposure across a series also signals inexperience. During event photography assignments, some images appear bright while others are underexposed. This often results from shifting lighting conditions without corresponding adjustments. Monitoring histograms regularly helps maintain consistency.
Another issue arises when students depend entirely on autofocus without verifying focus points. Cameras are capable tools, but they do not always select the intended subject. I teach students to choose focus points deliberately, particularly in portrait work where eye focus is critical.
Failure to move physically remains one of the simplest yet most overlooked mistakes. Many students stand in one position and rely on zoom lenses to adjust framing. Changing physical position often improves composition dramatically. Stepping a few feet left or right can remove distractions and strengthen lines.
Impatience also undermines image quality. Students sometimes take multiple rapid frames without evaluating light changes or subject positioning. I encourage deliberate pacing. Observe first. Adjust second. Capture third. Discipline slows the process but improves results.
I summarize these common mistakes at midterm and distribute a checklist. Before final submissions, students review each image using that checklist. Is the horizon level. Is the background clean. Is exposure balanced. Is white balance accurate. Has sharpening been restrained. These questions promote accountability.
The goal is not perfection. The goal is awareness. When students begin identifying errors independently, they progress rapidly. Technical photography tips become internal standards rather than external corrections.
As we approach the final weeks of the semester, the cumulative effect of disciplined practice becomes visible. Images show improved balance, cleaner backgrounds, controlled exposure, and thoughtful editing. The transformation is gradual but unmistakable.
As the semester draws to a close, I return to the sentence I wrote on the board during the first class: Light matters more than gear. By this point, the meaning has changed for the students. On the first day, it sounded like a warning. Now it sounds like a principle.
In our final sessions, I review what I consider the core photography tips that shape every strong image. Light direction must be evaluated before adjusting settings. Exposure decisions must serve intent. Composition must guide attention deliberately. Color must remain accurate unless altered with purpose. Editing must refine rather than overwhelm. These are not isolated lessons. They are connected habits.
I remind students that shortcuts rarely build consistency. Automatic modes can assist, but they do not replace understanding. Presets can speed workflow, but they do not replace judgment. Expensive equipment can expand capability, but it does not replace vision. Skill develops from repetition guided by awareness.
One particular moment from last spring remains clear. A first year student struggled throughout the semester with flat compositions and inconsistent exposure. During our final project critique, the student presented a portrait taken near a large window late in the afternoon. The light fell at an angle across the subject's face, creating gentle shadow and dimension. The exposure balanced highlights and midtones carefully. The background remained uncluttered. Color felt neutral and controlled.
I asked what had changed. The student responded simply, I waited for the light. That answer captured the essence of the course. Technical adjustments followed observation rather than replacing it.
That moment reinforces what I have learned over more than twenty five years of teaching. Photography tips are not tricks. They are not secret formulas. They are not trends that cycle through social media. They are habits practiced until they become instinctive.
They are discipline.
They are the willingness to examine a scene carefully before pressing the shutter.
They are the decision to adjust position rather than accept distraction.
They are the restraint to protect highlights and preserve natural color.
They are the patience to refine editing rather than exaggerate it.
Most importantly, they are about seeing before shooting. The camera records what is placed before it. The photographer decides what that should be. Vision precedes capture.
Each semester concludes with a final critique session. Students lay prints on the table or project files on the screen. The technical growth is visible. Horizons are level. Backgrounds are cleaner. Skin tones are accurate. Motion is frozen intentionally or blurred with purpose. Exposure feels deliberate rather than accidental.
I do not expect mastery in one term. Mastery requires years. What I expect is awareness. When students leave my classroom understanding why an image works rather than simply that it works, they are prepared to continue learning independently.
Photography evolves technologically, but fundamentals remain stable. Light still defines form. Exposure still balances brightness. Composition still organizes space. Color still shapes perception. Editing still demands restraint. These principles apply whether the camera is a professional mirrorless body or a phone.
On the final day, before dismissing the class, I write one more sentence on the board.
See first. Adjust second. Capture third.
Students photograph the board occasionally. I suspect many forget the exact phrasing later. What I hope they retain is the structure behind it. Awareness before action. Intention before adjustment.
That structure defines strong photography far more reliably than any piece of equipment ever will.